Understanding 3D printing for absolute beginners (Ender 3)
My 3D printing experience began when Facebook served me an ad for the Ender 3. The ad wrote:
- Ender 3 DIY Kit
- Cheapest in town!
RM900RM649 - FREE MK8 aluminium extruder upgrade
- 32-bit controller board
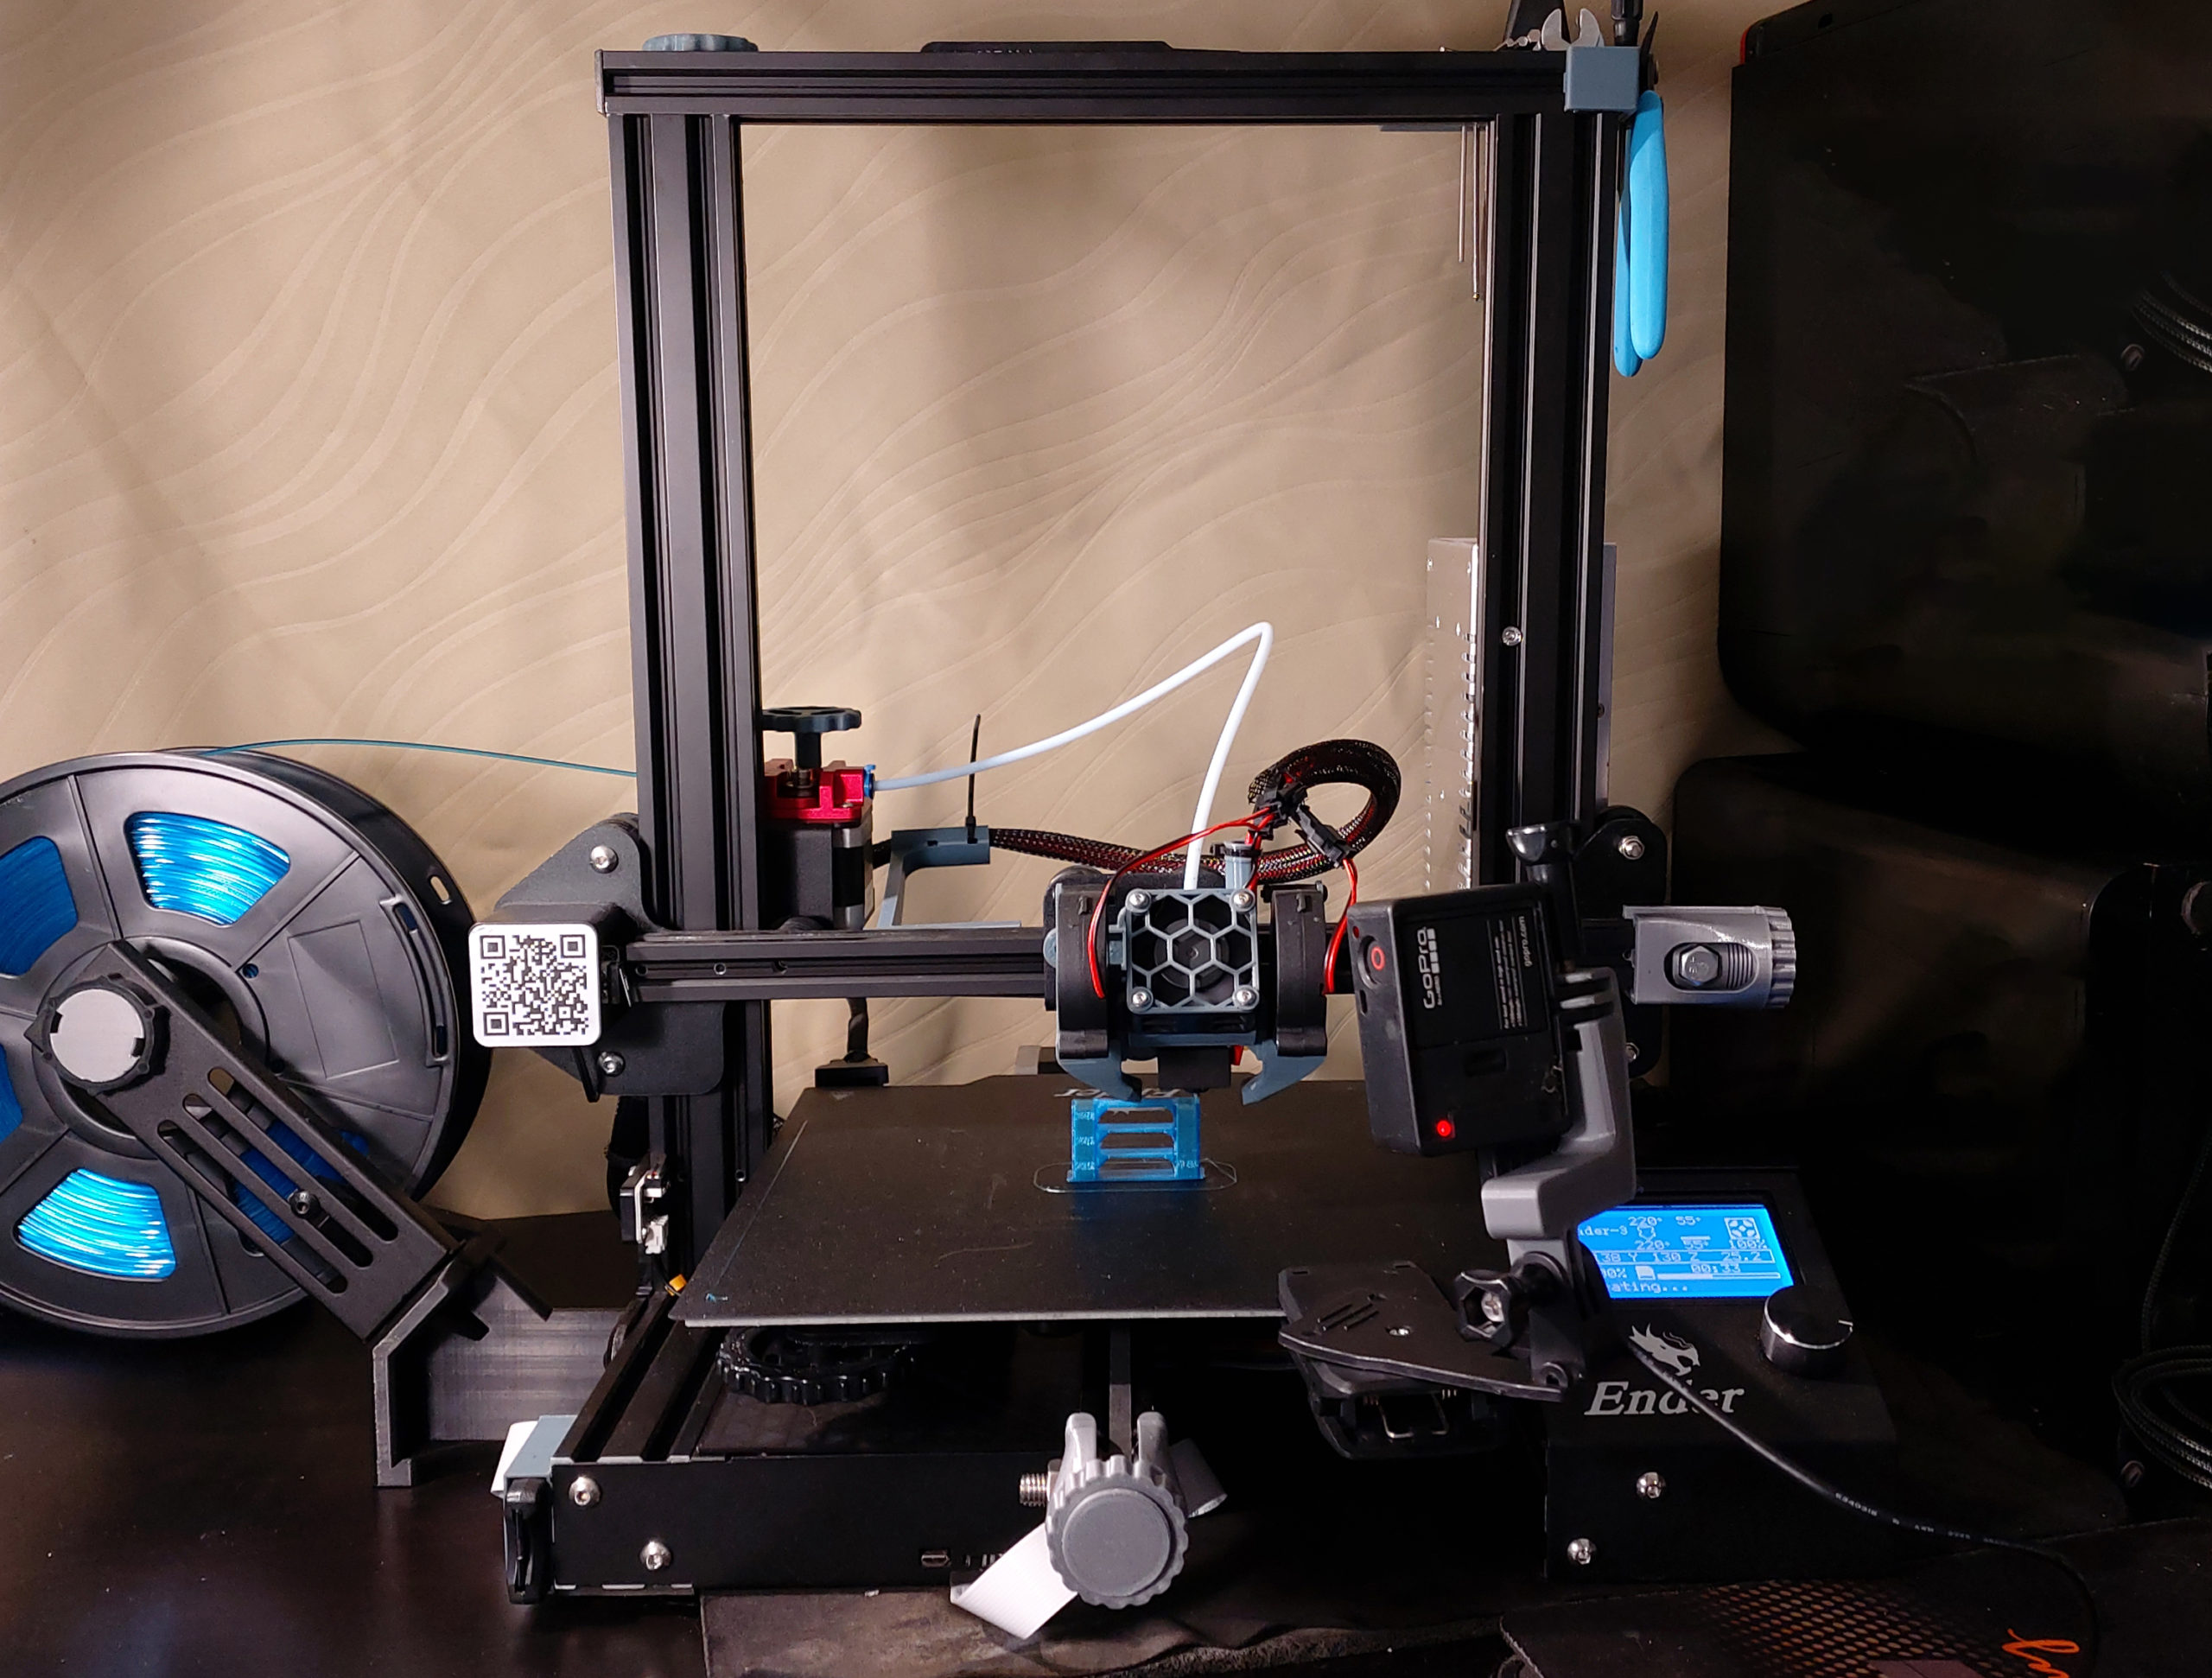
You had me at RM649 and FREE upgrades, however, nothing else in the ad made sense to me. I’ve heard of China clones and always thought that “good” 3D printers sold for over $1,000. So began my research, which led to persuasion and eventually a birthday present from my dear wife.
It has been close to two months since I started 3d printing as an absolute beginner, here’s how the journey is so far that might help you understand the hobby a bit more.
How an FDM 3D printer works (Simplified)

There are two types of 3D printers on the consumer-level market, Fused Deposition Modeling (FDM) and stereolithography (SLA) resin printing. I have no experience with the latter as the Ender 3 is an FDM 3D printer.
An FDM printer works by extruding filament through a heated nozzle. This melted plastic quickly turns solid when ‘drawn’ onto the print bed to form a thin layer. This process is repeated layer on top of layer to build up a 3D object.
The printer’s motherboard reads a .gcode file that has instructions. Among the many instructions are the X, Y and Z axis movements, how much filament is fed, and the nozzle and bed temperature. This .gcode file is produced by an app called a slicer that turns a 3D design model (usually a .STL file) into multiple printing layers based on your preferred settings.
3D Printing Jargon
Coming into this hobby without prior knowledge can be daunting. Before going any further, here are some helpful 3D printing terminology and jargon.
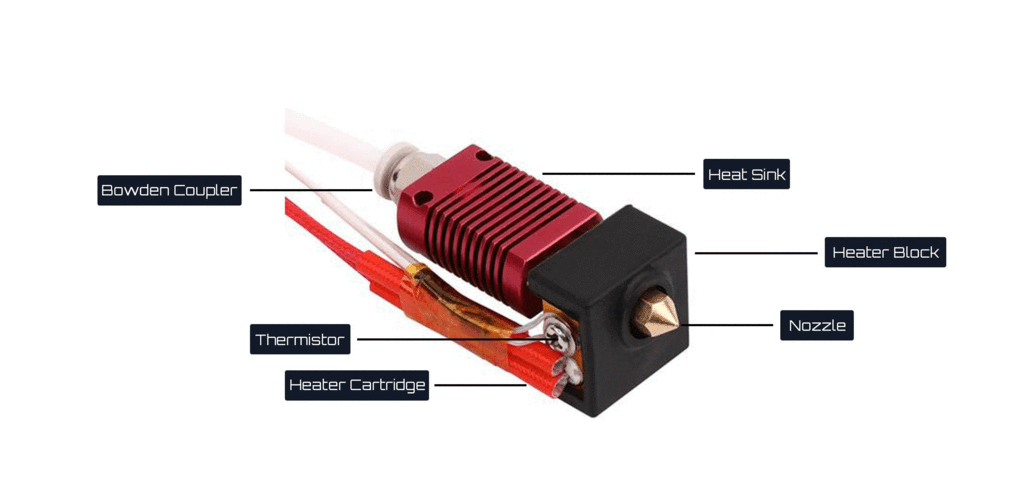
There are many types of filament, the most common being PLA. Filament is fed by an extruder and guided with a bowden tube into the hotend. The hotend assembly is broken into a few parts:
- The Heatbreak and cooling fan ensures that filament isn’t melted before reaching the nozzle, otherwise filament won’t be able to be pushed out consistently
- The nozzle screws into a heat block which sometimes has a silicone sock which stabilizes temperature,
- The other fan is called a part cooling fan which cools melted filament as it is laid on the print bed.
The print bed is the printing surface that is usually heated throughout a print to ensure the object can stay stuck to the surface. Stepper Motors control the movement of the 3 axes and also drives the extruder. There are also endstop switches to determine the (0,0,0) coordinates or home position of all 3 axes.
Relationship of hardware and software in 3D Printing
3D printing isn’t as simple as downloading a file, loading A4 papers and hitting print. A lot goes into understanding how your printer works while tweaking the machine and settings to produce quality prints.
Be ready to get your hands dirty as printer maintenance is part of the 3D printing journey. A printer moves and extrudes filament based on the .gcode file produced by the slicer. It’ll keep printing and won’t stop as it cannot identify when something goes wrong. The best way to maintain quality prints is to know your printer inside out so you can identify problems and troubleshoot.
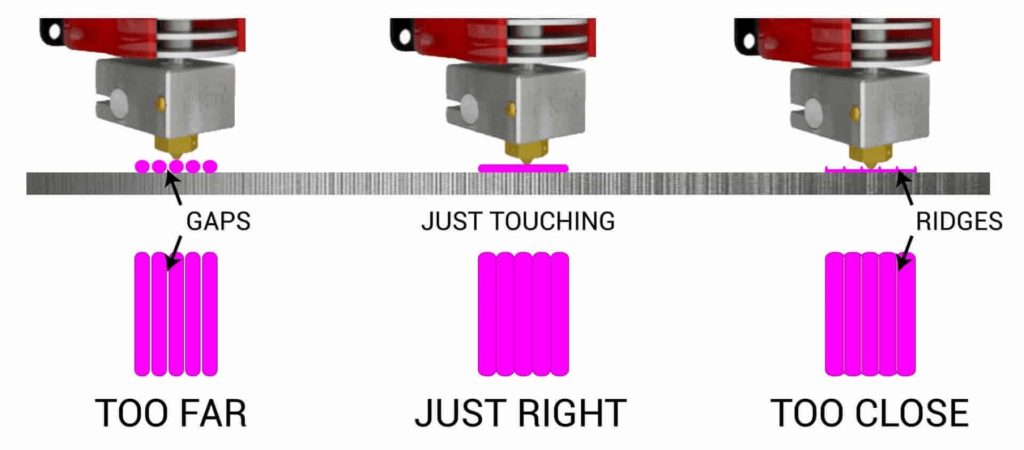
Levelling the print bed is crucial to getting a perfect first layer which determines print accuracy and the final quality. This is something you’ll be doing repeatedly and will need to get used to. Out of the many videos out there, I found this to be the most informative.
Get to know your axes (plural of axis). In the Ender 3’s prespective, the X-axis is the left/right movement of the print head (also known as hotend), Y-axis is the forward/backward movement of the bed, and Z-axis is the vertical movement. These two videos really helped me get the X and Z axis moving smoothly.
Slicing, print orientation, and design limitations
You can’t print on air. A print starts by sticking itself to a surface and building up from there. It’s important to understand how orientation affects your print. A lot of this is learnt throughout the process of slicing. As mentioned earlier, Slicers such as Cura turn .STL 3D files into layers and produces a .gcode file with instructions for your printer.
Cura has many settings that you will need to explore before getting a hang of it and knowing what you want in a print. Settings like wall thickness, how hollow or filled a print should be, whether supports are required, line thickness and many more to ensure a functional and good quality print.
Depending on how far you want to take 3D printing, learning 3D design to make your ideas come to life is very rewarding. By learning 3D design, I have made things specific to my use case. Understanding the process of slicing and design limitations of 3D printing is an important step to this hobby.
Like me, you’re late to the game
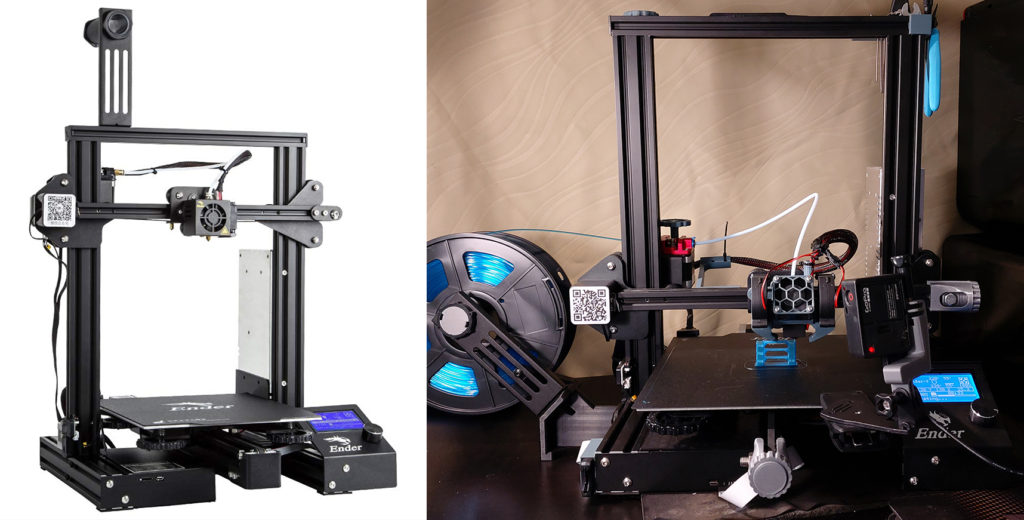
3D Printing has been around for many years, evident by the (still relevant) tutorials on YouTube from 2014/15. This is a good thing as the hobby has matured with a ton of resources and guides to help you start printing. The first video I watched repeated was how to assemble the Ender 3 by CHEP, which is the obvious first thing to do when buying this printer unassembled.
Another great resource is All3DP.com where I keep their 3D printing troubleshooting guide handy. With 3D printing being so affordable now, I believe it’s the best supplementary tool for your other hobbies, as you can just design and print something you can never find on store shelves.
Stay tuned for more articles on my beginner 3D printing journey.